This article succeeds the previous article. If you have questions about the hardware, please refer to Part I: Building a Password Cracking Rig for Hashcat
We are going to make a few assumptions for this rig ( for instance, we are going to use a GNU/Linux OS for this build.) There are a lot of compelling reasons to do so, including increased developer support, greater number of complementary utilities for analysis and processing, and superior resource management. Since @hashcat's main development platform is Ubuntu it only makes sense to use it here.
I am going to cover the steps for installing both AMD and NVIDIA drivers for completeness, however I would strongly encourage you to use NVIDIA cards in your builds. The AMD drivers are essentially garbage. If you choose AMD do not use the Catalyst drivers, they are not compatible with Hashcat 3.x. At the moment ROCm drivers are still fairly experimental and not entirely reliable, so we will be using the AMDGPU-PRO drivers. However, not that there is a well-known issue with AMDGPU-PRO: You will only be able to run Hashcat once, and then you will have to reboot before using it again. You have been warned.
The rest of this article will be split into the following sections:
- Installing Ubuntu
- Post-Install Configuration
- AMD Drivers
- NVIDIA Drivers
- Installing Hashcat
Installing Ubuntu
You can grab an ISO from Ubuntu's website and either burn a CD or copy to a USB stick for installation. When you are downloading, make sure you get the Ubuntu 16.04 x86_64 Server edition.
NOTE: For builds using the AMDGPU-PRO 17.30 drivers, you must use Ubuntu 16.04.2. Later versions of Ubuntu are known to cause reliability issues.
You might ask why 16.04, since later versions of Ubuntu exist. This version is an LTS (Long-Term Support) release, meaning things are going to be less likely to break over time on your rig. That is definitely something we want.
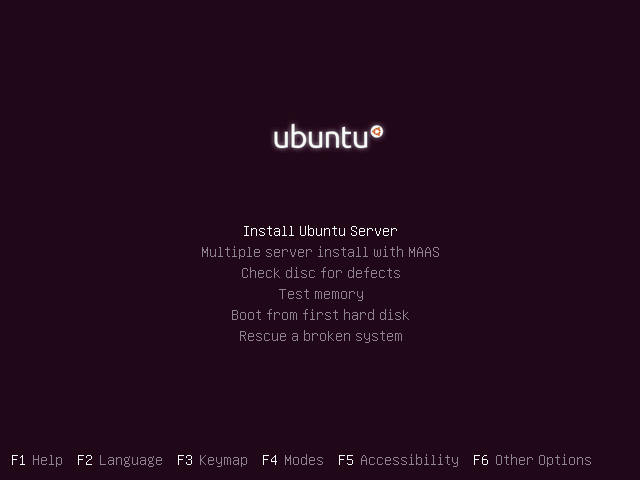
When you boot up from your installation media, a pop-up window should open asking you to select a language. Go ahead and select your language to continue.
Select install from the next screen.
Ubuntu should now pull-up the main installation manager. You can simply follow the prompts, choosing the defaults for most options. A few notable exceptions are listed next.
Encryption for your home directory - You don't need to select this option, but feel free to do so if you'd like.
After choosing "guided - use entire disk and setup LVM" in the disk partitioning, it will ask you:
Write the changes to disks and configure LVM?
Select Yes (there may be two such messages).
Write the changes to disks? Yes
Eventually you will arrive at the package selection screen. Select the OpenSSH server (by hitting space bar), and then press enter to continue.

After installing Grub, the system will reboot, and your new system will come up.
Post-Install Configuration
Log into your new system. The first thing you should do is update all of your system packages.
NOTE: Do not do this if you are using AMDGPU-PRO 17.30. You must stay at Ubuntu 16.04.2
$ sudo apt update && sudo apt upgrade
After updating, we are going to install our system prerequisites.
$ sudo apt install -y build-essential p7zip unrar unzip
AMD Drivers
If you are installing NVIDIA cards, you can skip ahead to the next section.
The new AMDGPU-PRO drivers have less dependencies on the X window system, which is great for us. This makes our setup much easier.
Download the latest AMDGPU-PRO drivers (at the time of this writing, that is 17.30).
$ curl --referer "http://support.amd.com/en-us/download/desktop?os=Linux+x86" -o amdgpu-pro-17.30-458935.tar.xz https://www2.ati.com/drivers/linux/ubuntu/amdgpu-pro-17.30-458935.tar.xz
Unpack the archive and run the installer.
$ tar -xJvf amdgpu-pro-17.30-458935.tar.xz
$ cd amdgpu-pro-17.30-458935/
$ sudo ./amdgpu-pro-install
This script will install several AMD packages on your system. Once completed, make sure the display is exported on login.
$ echo 'export DISPLAY=:0' >> ~/.bashrc
Add yourself to the video group to get access to the GPUs without needing root permissions.
$ sudo usermod -a -G video $USER
At this point, you should now reboot your box!
$ sudo reboot
When it comes back up you should be presented with a blank screen and a mouse cursor. Use SSH to log back in. Check your GPUs using clinfo.
$ clinfo
If all you see is your CPU, then something went wrong with your install and you must correct it before you can proceed. You should have more than one OpenCL compute device.
NVIDIA Drivers
If you are installing AMD cards, feel free to skip this section.
We need to install some additional prerequisites for NVIDIA.
sudo apt install xserver-xorg-core xdm libgtk-3-0
Next, we should blacklist the nouveau driver (the installer can also do this for you automatically, but we need to update the initramfs anyway so let's just do it all now.)
$ echo "blacklist nouveau
options nouveau modeset=0" | sudo tee /etc/modprobe.d/disable-nouveau.conf
$ sudo update-initramfs -u
Download the latest NVIDIA drivers.
$ curl -o NVIDIA-Linux-x86_64-384.59.run http://us.download.nvidia.com/XFree86/Linux-x86_64/384.59/NVIDIA-Linux-x86_64-384.59.run
We will run the binary we just downloaded.
$ sudo bash NVIDIA-Linux-x86_64-384.59.run
Accept the license that will pop-up and follow the prompts.
If it asks you to register the kernel module with DKMS you can feel free to do so.
The NVIDIA installer will build for a while, and may present the following message when it finishes:
WARNING: Unable to find a suitable destination to install 32-bit compatibility libraries. Your system may not be set
         up for 32-bit compatibility. 32-bit compatibility files will not be installed; if you wish to install them,
         re-run the installation and set a valid directory with the --compat32-libdir option.
Just click Ok to continue.
Would you like to run the nvidia-xconfig utility to automatically update your X configuration file so that the
NVIDIA X driver will be used when you restart X?  Any pre-existing X configuration file will be backed up.
Choose YES for this prompt as well.
Before we reboot, let's set interactive mode to false in our xorg.conf.
$ sudo sed -i '/Driver/a Option "Interactive" "False"' /etc/X11/xorg.conf
Make sure the display is exported on login.
$ echo 'export DISPLAY=:0' >> ~/.bashrc
Now, we can reboot!
$ sudo reboot
Installing Hashcat
Download the latest Hashcat.
$ curl -o hashcat-3.6.0.7z https://hashcat.net/files/hashcat-3.6.0.7z
Unpack the archive.
$ 7zr x hashcat-3.6.0.7z
Let's just change into our hashcat directory and see if we can run a benchmark to test it.
$ cd hashcat-3.6.0/
I like to make a link to the main binary (just to type less later).
$ ln -s hashcat64.bin hc
And now we can try to run our benchmark.
WARNING: At the time of this writing, AMDGPU-PRO drivers are incapable of completing a hashcat benchmark, and are likely to leave your system in a state where it will hang. For now, skip benchmarks when using AMDGPU-PRO drivers. This also implies that some algorithms simply won't work properly with AMD at the moment.
$ ./hc -b
If everything was successful, the benchmark should begin. It takes about a half hour to finish to completion.
Hashcat should now be ready to play!
I have additional articles on how to use Hashcat for those who need it. Happy hacking! (And please be responsible).